
 If you're already using 3rd-party software for adjusting the screen temperature, make sure you uninstall it so that it doesn't clash with the Window's feature. Do complete this step without any fail.
After activating this feature, do not hesitate in adjusting and fine-tuning its configuration to get the best results. So, let's get started and adjust our computer's screen temperature, automatically.
To get started, go to the Settings → Display section.
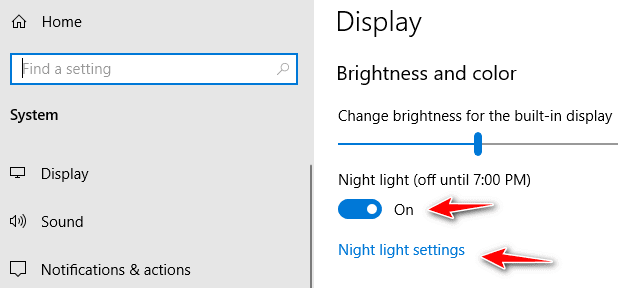 Here, you'll find the Night light option. If it's not activated, switch it on as shown in the image above. There's another option right below it to further customize its settings.
Let's see how we can customize it as per our needs upon clicking (night light settings) that option.
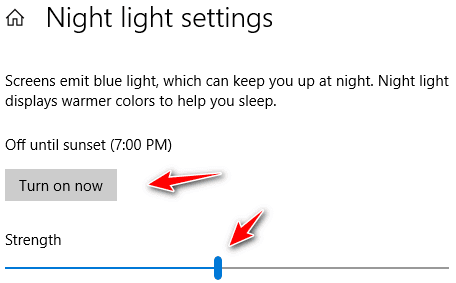 The first section available here is all about customizing the color temperature. You can fine-tune it as per your needs. It can be customized multiple times as you experience its effect after usage.
Once you get the perfect color temperature, you can keep it that way. There's another important section to look upon. Let's see what it's all about!
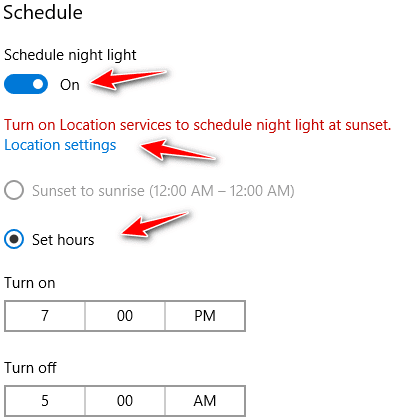 And, now comes the most important setting. The scheduling of night light settings enables you to specify and start and end time of this effect. First of all, you have to turn it on.
Next, if you want it to get started automatically at your local sunset time, turn on the location services.
And, last but not the least, you can specify a custom start and end time for the night light effect. Make sure you choose the best timing when it should start.
The settings shown above are used by me. Because, I keep my location services disabled, I opted for a custom schedule. If your location service is already on, I'll recommend you let the scheduling service rely on that data to get the best possible results.
