
Accidental deletion of files and directories is quite common when working on a computer. Sometimes, you do it deliberately and later realize you need the deleted one. Here, I'm talking about the permanently deleted files. Not the ones in the recycle bin. The recovery of a deleted file on any operating system depends on several factors. One of the major factors is whether the blocks storing the deleted file data are overwritten by other any write operation. If yes, the file would be either partially recovered or cannot be recovered at all. Let's learn how we can recover these deleted files in Windows in a few easy steps.

If a file has been deleted through a shredding application, none of the recovery techniques mentioned below will work. Such files are not recoverable. So make sure you not attempting to recover such files.
Remember, file recovery is a slow process when the size of the file is a bit large. It takes a few minutes to recover huge files. Let's get started and check out all the methods to recover deleted files in Windows.
1. Use Windows File Recovery Utility
One of the handiest and most reliable tools to recover deleted files is the Windows File Recovery utility. You can easily install it with a click of a button.
Make sure you have Windows 10 build 19041 or later to use this tool. It's a command line utility that works flawlessly whenever the file is recoverable.

Apart from recovering files from the local (inner) drives, this utility can also recover files from external drives. But, recovery from remote cloud storage and network drives is not possible.
Let's see how to use this command.
For demo purposes, I'll create a text file sample.txt on the desktop and then I'll delete it. Then, through this utility, we'll try to recover it. Let's get going.

You can either delete the file from the desktop through the GUI or you can use the del command on the DOS prompt. I've done the same. So now, our file has been deleted.
Now, the command winfr we're going to use works in two different modes.
- Regular mode - You should use this mode when the file has been deleted recently. In other words, when the probability of recovering a file is very good.
- Extensive mode - Extensive mode is generally used when you're trying to recover a file deleted long ago. Or, you're recovering files from a formatted or corrupt disk.
Apart from these two modes, a switch /n can also be applied to specify the location or type of files we want to recover. Wild cards are supported with this switch.
In our case, I'll use the following command to recover the sample.txt file.
winfr C: F:\test\ /regular /n *.txtAfter the command, the first parameter is the source drive from where to search for a file. the second parameter is the destination drive where the recovered files will be saved. In my case, I've specified the F:\test\ folder.
The regular mode switch is also visible in the command. And last but not least, I've used the /n switch to search only for the text files.
winfr C: F:\test\ /extensive /n *.txtIf you had deleted this file long back, the mode will be different. As you can see above, now the extensive mode has been used. Remember, this mode may take more time than the regular one.
There are several advanced switches available to be used with this command. But, I've skipped them to keep things simple. You can read its documentation to dive deep into all the recovery options.
2. Use Windows System Restore Points
Another good way to restore files is to use Windows restore points. These restore points are like a snapshot of the files and directories at a given point in time.
Some operations automatically create a restore point. For example, updates, software uninstallation, or installation through specialized software. A restore point can also be created manually.

To restore your Windows system to a previous state which in turn will bring back the file you want, use the Windows + S key combination and type restore in the search text box.
It'll give you the option to create a restore point as shown in the image above. Click it to open the tabbed dialogue box.

Click the System Restore... button to open the system restoration wizard.
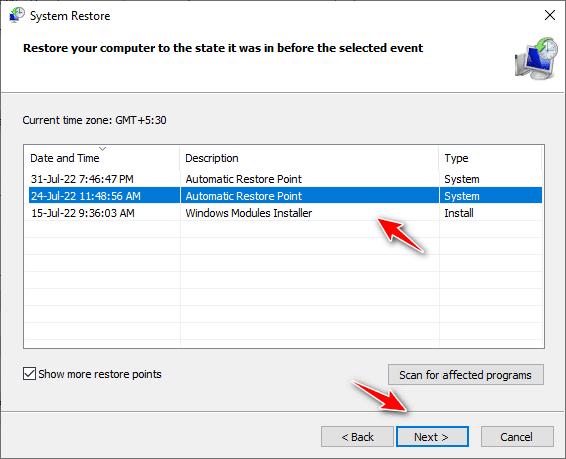
Within the wizard, click the Next button till you reach the dialogue (shown in the image above) where all the available restore points are listed. Check the box to show all the restore points.
Here, select the restore point you want to revert to and click the Next button.
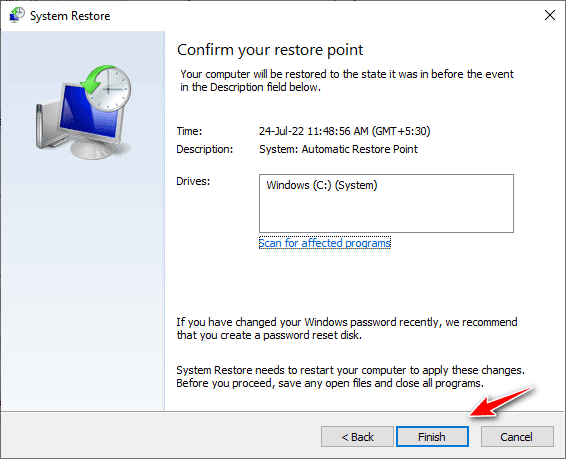
And finally, click the Finish button to start the restoration process. It may take some time if the amount of data to be restored is—significant.
It's one of the safest ways to recover old data lost during major changes in your Windows PC.
3. Use 3rd-Party Recovery Solutions
If text-based utilities are not your cup of tea, you can opt for 3rd-party file recovery applications. These tools are easy to use and enable even a layman to recover the data in a few clicks.
Following are some of the best 3rd-party file recovery applications.
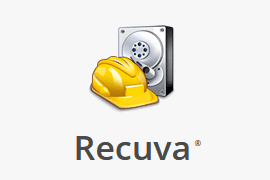
Recuva is undoubtedly one of the most popular file recovery applications. Its free version is good enough to fulfill most of your needs. The interface is simple and it works like charm.
It has the reputation to recover files from damaged or corrupted storage media. Its deep scanning mechanism looks at every corner of the disk to identify every recoverable file. It also has a built-in file shredder which enables you to securely delete a file. The pro version of this application also supports virtual hard drives. I've used it for years and can vouch for its excellent functionality.
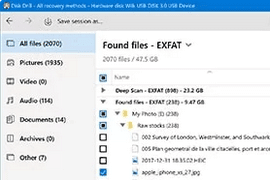
Disk Drill is no less than the one mentioned above. It's a full-fledged file recovery software with a large user base. It's available for both Windows and OS X environments.
This one too has a free version that allows you to recover up to 500 MB of data. This much is good enough for most users. It can also recover data from iPhone and Android devices when using a Mac computer. It has a fast search mechanism both for drive scanning as well as for finding the files from the list of recoverable entries. The software itself leaves a very light footprint on the computer.
