
For decades, the Windows command prompt was the default terminal available for the power users and developers. But now, Windows Terminal is the preferred choice. It has a plethora of features that are non-existent in the classic command prompt window. In this tutorial, we'll learn about customizing the Windows Terminal for better coding and development experience. Most of these customizations are associated with the appearance and behavior of the Windows Terminal. Applying these customizations can help you get more out of your coding and command-line sessions. So, let's get started!

Remember, if you're using a Windows version older than Windows 10, you won't be able to install or use Windows Terminal. There are several 3rd-party terminal emulators too, but this one is the best.
I use Windows Terminal to run my WSL instance shell. I also use a custom shell wrapper and additional packages to tightly integrate Visual Studio Code with it. So, without any delay, let's customize it.
Important Keyboard Shortcuts
Before we move ahead, let's take a look at some of the most important keyboard shortcuts for Windows Terminal. You can use these shortcuts to speed up your workflow.
- Ctrl + Shift + P - This handy shortcut opens the command palette. In case, you're not interested in memorizing the shortcuts, a nicer way to trigger different actions is to do it through the command palette. I rarely use it, but you may find it handy.
- Ctrl + Shift + , - This is one of the commands I often use to open the settings file which is essentially a JSON document. Power users can use it to provide the necessary directives and settings to add, remove, and customize various features and actions.
- Ctrl + Shift + <number> - This keyboard shortcut is used to open a specific preconfigured profile. For example, on my desktop, I'll use
Ctrl + Shift + 2to open a Windows command prompt in a new tab. - Ctrl + Shift + T - It is used to open a new tab with the default profile. This default profile is picked from the settings file.
- Ctrl + Shift + F - This handy shortcut is often used to search for text in the active tab. It's useful when you're running a series of commands with a lot of verbose output.
- Ctrl + , - This one is dead simple. It opens the settings GUI instead of opening the settings file.
There are dozens of keyboard shortcuts. But, I've picked the most common and important ones you may use, now and then.
Key Startup (Launch) and Interaction Settings
Following are some of the most important settings related to the launch or start of a Windows Terminal. You can also use the default settings, but I'll recommend changing a few of them for a better startup experience.

The Launch mode settings dictate the size of the window whenever you start this application. In most cases, the user wants it to be in a Maximized state. And, that's what I prefer for this setting.

Here, I have covered two settings in one go. The first one is the selection of a default profile. You can see, that I want the WSL instance to boot up, whenever I open the Windows Terminal application. You are free to choose your preferred profile from the drop-down menu.
The second one governs whether the application should start automatically every time you boot up your Windows machine. In most cases, we do not want that though you can change it as per your needs.

In the Interaction tab, there's one option that must be enabled. It's about detecting URLs and making them clickable. It's so useful as commands spit out different types of URLs which you want to open—directly through a click.
Appearance and Color Scheme Settings
The next important setting is related to the theme of your terminal. In older versions of Windows Terminal, theme customization was a bit difficult. But now, you can easily do it through the GUI controls.
It applies to color schemes as well.

To change your Terminal's theme, go to the Appearance tab and select your preferred theme from the drop-down menu as shown in the image above. Using a Windows theme is advisable as it automatically picks your current system-wide preference.
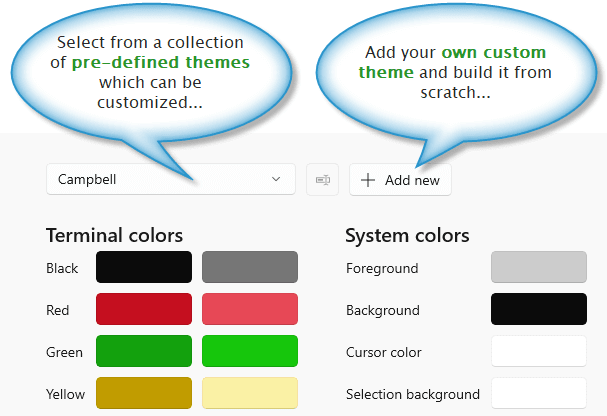
In the Color schemes tab, you can either select from a collection of pre-defined schemes, or you can create a custom theme that can be customized as per your preferences.

Color customization is dead simple as Windows Terminal opens a color picker for every color to let you pick a custom one with a click of a button.
Default Appearance Settings
If you want some of the key appearance settings to be applied to every profile, you can do so—easily. This can be done through GUI as well.
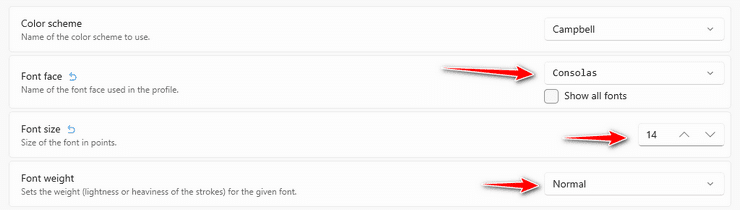
Go to Settings → Defaults → Appearance and customize the available options as per your preferences. I generally customize the font size, font face, and the font-weight.
If you specify these settings in a profile, these default settings will be overridden if that profile is used. So, make sure you do not override these settings in your profile settings.
Other important setting users often customize is the transparency of the terminal window. Let's see how to do it.

First of all, enable the transparency effects at the operating system level. Go to Windows Settings → Personalization → Colors → Transparency effects option. Enable it!

Now, in Windows Terminal, go to the Settings → Defaults → Appearance → Transparency option. Here, adjust the transparency—you want—through the slider (see image above) and make sure the acrylic material option is enabled as well.

And, if you want a custom background image for your Windows Terminal, go to the Settings → Defaults → Appearance → Background image option.
Here, you can either select a custom image file or can choose to apply the current wallpaper. I also fine-tune the background image opacity to get the best command-line experience.
Custom Profile Creation
You can also create your custom profile to pick the shell environment you want to use with its appearance settings.
There are two approaches to creating a custom profile. Here's how to get started with it.
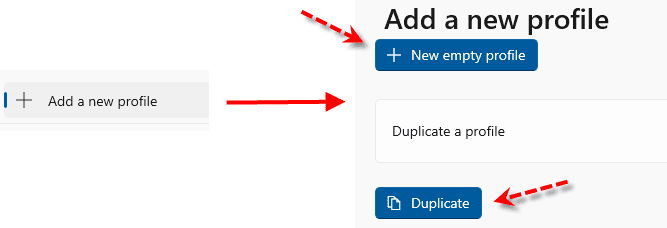
First of all, click the Add a new profile option. You'll get two sub-options to kickstart the profile creation process. Either clone an existing profile and make changes to it or make a new one from scratch. To learn it thoroughly, we'll opt for the latter option.
For demo purposes, we'll add a new profile for the Git Bash shell environment.
Click on the New empty profile button to get started.
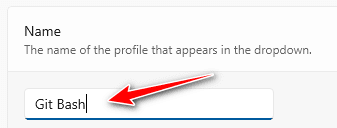
Provide a relevant and meaningful name for the custom profile. In our case, quite obviously, we'll provide Git Bash as the name for the custom profile.
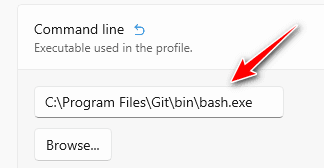
Nex, we have to select the executable file for the command line environment. Note that we've selected the executable present in the bin directory. That's the one we must use for the Git Bash profile.
Though it's optional, I'll recommend providing a custom icon for the profile. This icon is displayed in the title bar of the tab.
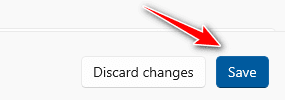
Finally, click the Save button to finish the profile creation process.

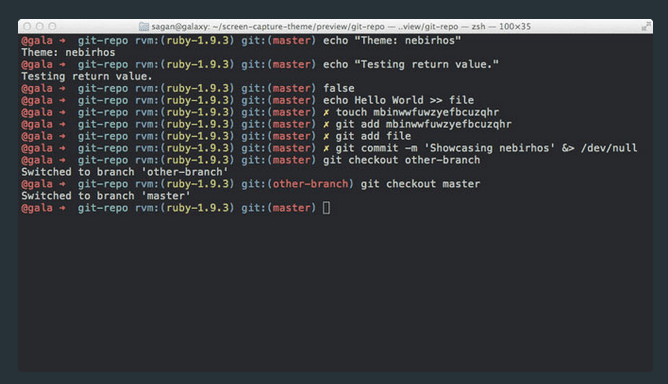
And, this is how the Git Bash shell looks in my Windows Terminal window. In your case, it may look completely different because I've done several visual customizations in my terminal.
Custom Shell Frameworks
And last but not least is the custom shell framework developers often use while working in a Linux environment. Windows Terminal is often used by developers for working with a WSL instance.
And, for that, Oh My Zsh is a popular and highly-configurable shell framework. I use it too.
This shell framework provides you with tons of plugins and themes to customize your development environment as per your needs.
If you work with WSL in a Windows Terminal, I'll recommend installing this shell framework for better experience and productivity.
