
 Speed optimization steps aren't going to optimize resource-intensive tasks like video and graphics editing. So, make sure you aren't expecting great performance improvements while doing such tasks.
You can apply these optimization techniques in any order. In case, you're going for a hardware upgrade, defer the optimization process until the former process is completed. Though it is not necessary—still—one can back up the important files before kickstarting the process. Let's get started!
1. Disable Unnecessary Startup Tasks
On almost every Windows PC, there are several tasks (processes) which are started automatically as the computer boots up. Some of these tasks are unnecessary and puts burden on system resources.One of the best ways to speed up a PC is to disable these unnecessary tasks. Here's how to do it.
 Right-click on the task bar, select the Task Manager option from the context menu. Thereafter, go to the Startup tab as shown above.
Scrutinize each of the startup tasks listed here and select the ones that need to be disabled. Right-click on each of the shortlisted task entry and click the Disable option. This action will ensure that the unnecessary and additional burden is removed during the PC boot up.
2. Uninstall and Remove Bloatware or Crapware
Another important issue to address is to check and delete both the unused and junk applications residing on your system. These unnecessary applications not only gobble up storage space but may also affect the system's performance.There's a 2-step method to deal with this problem. First of all, right-click on the start menu icon and click the Settings option. Thereafter, click the Apps option.
 Here, select the applications which either are never used by you or are not necessary for your daily workflow. Select each such application and click the Uninstall option.
Once the unused applications have been removed from the system, address the hidden or difficult to access malware or malicious applications which may be slowing down your Windows system. To do so, use a specialized software capable of scanning, detecting, and removing malware from the computer.
3. Keep Hard Disk Clean and Defragmented
Another important issue that may contribute to slowing down your PC is the state of your hard disk. Near-To-Full disk space or a highly fragmented file structure considerably slows down the system.Following is a comprehensive tutorial to address both these problems.
In case your system drive is packed with limited space, disk cleaning exercise is a must. It'll free up space for important system files that are generated dynamically and occupy a lot of space. Make it a monthly routine to keep your hard disk in a healthy condition, that'll aid in removing lags—while working.
4. Optimize and Tweak Windows Power Settings
A correct power saving option can give you an instant performance boost. To check your current power settings, right-click on the start menu icon and choose Power Options from the context menu.On the Power & sleep tab, click the Additional power settings option. Depending on your hardware and the type of computer you're using, you may see additional power options.
 Most probably, the Balanced plan will be active on your system. Switch to the High performance plan to get a more responsive working experience on your PC.
When on an AC power, the high-performance plan works best. You can also create a custom power plan if required. I'll recommend frequent travelers using laptops to stick to a balanced power plan.
5. Optimize Visual UI Effects
Default Windows 10 visual effects consume system resources and can slow down a slightly old computer system. Turning off these fancy visual effects can relinquish the resources and can boost the performance of the overall system.The downside is that you'll lose all the fancy animation and fading effects. Let's see how to do it. Press the Windows + S and type
sysdm.cpl in the search box. Hit the enter key to open the System Properties dialogue box. Switch to the Advanced tab and click the Settings... button within the Performance section. It'll open a new dialogue box (see image above) where you should select the Adjust for best performance option.
Another important setting to disable is as follows. Go to Settings → Personalization → Colors option. Here you'll find several settings related to the transparency and color effects.
 Disable all the three settings as indicated above. In case you're running your Windows 10 copy on a high-end system and doesn't like the stripped-down visual effects, simply skip both these steps.
6. Disable Windows Tips and Tricks Suggestions
Another unnecessary feature that consumes system resources is the tips and tricks suggestions Windows automatically display while working on a PC. To do this, the Windows system tracks your activities and usage pattern to show contextually related tips. To disable this feature, go to Settings → System → Notifications & actions → Notifications option. Here you can disable this specific feature as indicated by the red arrow in the image above.
The other two options included in the image can also be turned off because they're not necessary for your daily workflow. I personally keep all these 3 options—disabled.
7. Stop Syncing of OneDrive Storage Service
If you're storing and syncing your local files with your OneDrive account, the performance may get affected if you frequently modify or change a large number of files on a daily basis.To assess the impact of this syncing activity on your computer's performance, right-click on the OneDrive icon and select the Pause syncing option. Select the 8 hours option to get an entire day to assess the difference in performance after the pause of syncing activity.
 In case, you feel a substantial improvement in performance during the temporary disabling of the syncing activity, go for the permanent stoppage of this service.
To do so, select the Settings → Account → Unlink this PC → Unlink account option from the context menu. It'll stop the syncing activity on a permanent basis and the files will be stored locally.
8. Disable Unnecessary Background Services
Whenever a computer boots up, several services are started automatically which runs continuously in the background. Some of these services are either never used or are rarely used. These unnecessary background services consume system resources and may slow down the PC.To address this issue, you need to identify these services and need to disable them. To do so, press the Windows + S key and type
services.msc in the search box. Hit the enter key to open the service management application. Once you've shortlisted the unnecessary services, double-click on each one of them and choose the Disabled option as shown above. Click the Apply button to finish the process.
Note: Unless you're not clear about the functioning of a specific service, do NOT disable it.
As cautioned above, go ahead with this performance-boosting step only when you know what you're doing. In case, disabling a service disrupts the normal functioning, simply enable it back.9. Disable Live Tiles in Start Menu
The live tiles in the start menu is another resource-hogging feature which can affect your system's performance in a negative way. Depending on the type of app, some of these live tiles also show ads.To reclaim more system resources, these live tiles need to be turned off. There are two ways to do it.
 The easiest approach is right-clicking on each of the live tile and selecting the Turn live tile off option from the context menu. You have to repeat this process for each of the active live tile.
Windows 10 Pro users can use the second option. First of all, type
gpedit.msc in the search box opened through the Windows + S key. Hit the enter key to open the local group policy editor.Next, enable the User Configuration → Administrative Templates → Start Menu and Taskbar → Notifications → Turn off tile notifications option.
10. Use ReadyBoost Drive
Computers with low RAM (4 GB or less) can take advantage of the ReadyBoost feature. Through it, a fast and removable storage device can be used in the form of a disk cache service.This helps the systems with low RAM remain responsive whenever the data in the memory needs to be cached to the disk. You'll need a regular memory card and a card reader slot in your PC.
 To get started, insert the memory card (through an adapter) in the reading slot. Format the card and right-click to access the Properties option.
Switch to the ReadyBoost tab and select the same option as shown above. Select the entire storage space by dragging the slider to the right. Click the Apply button to complete the configuration.
11. Optimize the Bootup and Startup Time
If you're using a dual-boot system, the Windows boot menu halts for up to a half minute to show a list of available operating systems. This definitely is an unnecessary delay in the bootup process.The obvious solution to this problem is to reduce the boot menu timeout period. Depending on your reflexes, you can reduce this timeout period for up to 5 seconds.
 To reduce this timeout period, go to the Control Panel → System → Advanced system settings → Advanced → Startup and Recovery → Settings... → System Startup option. Here you can reduce the waiting period for the boot menu.
 There's another handy option to speed up the booting process. It's effective when you boot up a PC after a regular shutdown.
To make it happen, open the Control Panel → Power Options → Choose what the power button does option. Here, check and activate the Turn on fast startup option.
12. Disable Search Indexing
By default, Windows 10 indexes the files and directories in the background to provide you instant search results. On older PCs, this background indexing activity can significantly slow down the computer.The best way to deal with this issue is to completely disable the indexing activity and its associated service. It may give the search results—a little slower—but the performance gain is worth it.
 To disable search indexing, use the Windows + S key to open the search box and type
 services.msc in it. Hit the enter key to open the service management window.Double-click on the Windows Search service. Click the Stop button and select the Disabled option from the drop-down menu. Finally, click the Apply button.
13. Use Performance Monitor to Find and Fix Bottlenecks
A handy tool to find out issues and bottlenecks that may be affecting your computer's performance is the Resource and Performance Monitor utility. One can use it to identify the performance related issues in an easy way. To get started, type the
 perfmon /report command in the Windows search box and hit the enter key. Depending on your system's hardware configuration and the number and type of applications installed, the scanning and report preparation process may take one or several minutes.Once the report is ready (as shown above), you can go through all the information and can identify the problems related to the performance issues. The report also suggests ways to tackle these issues.
14. Add More RAM
One of the sure shot methods to speed up your PC is to add more or a better type RAM to the system. If your PC has just 4 GB of RAM, I'll strongly recommend adding at least another 4 GB to the same.One of the problems a PC owner often face is to find out the type of RAM currently used on his system. Fortunately, there's an easy way to find out this information.
 Open the Task Manager and switch to the Performance tab. Now, select the Memory sub-tab. Here, you can find the type of RAM, memory speed, number of slots on the motherboard, and the form factor information. It'll help you in purchasing the right type of RAM for your PC.
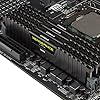 Corsair Vengeance LPX 16GB (2x8GB) DDR4 DRAM 3000MHz C15 Desktop Memory Kit - Black
15. Go for an SSD Drive
Quite similar to the RAM upgrade, substituting your old hard disk with a modern solid-state drive (SSD) can speed up your Windows experience with many folds. Because SSD doesn't contain any moving parts, its reading and writing speed is exponentially higher than a regular hard disk. Samsung 860 EVO 500GB 2.5 Inch SATA III Internal SSD (MZ-76E500B/AM)
16. Use Windows Troubleshooter to Find Performance Bottlenecks
And, last but not the least are the Windows 10 inbuilt troubleshooting options one can use to resolve issues which may be affecting the overall performance of the computer.If you're experiencing a problem with one or more functions on your PC, use these troubleshooting options to rectify the same and to boost the performance of your Windows 10 desktop.
 To access the troubleshooting options, go to the Settings → Updates & Security → Troubleshoot option. Here, you'll find different categories one of which may be associated with your problem.
Simply click on the respective category and click the Run the troubleshooter button to start the rectification process. It's one of the best ways to address performance related issues.
